Nothing is better than a freshly-ground cup of coffee.
It awakens your senses, has an aroma like nothing else on this earth and delivers caffeine, B vitamins, and tantalizing flavor along with mental stimulation.
Well, that is, if you can get it out of the grinder. Your grinder is jammed, that’s why you’re here—let’s fix that.
We’re going to go over what makes a jammed coffee grinder in the first place, so we know how to avoid it and fix it going forward.
Why do Coffee Grinders Get Jammed?

There are a few reasons that your burr grinder could get jammed. Let’s go over each of them and their main preventative measures.
Lack of Cleaning
Over time, debris builds up inside of your grinder. It’s just part of the process.
Parts of the shell of each bean can get trapped in between metal sections inside the grinder and slowly jam it up.
If your grinder is turning on and operating fine, but the grounds that it produces aren’t good enough (inconsistent size, appearing like blade-grinded coffee beans, etc.), then you might just need to clear it out.
Use a brush, get the debris out, and grind in some Grindz tablets for cleaning, or simply put a cup of long-grain white rice into your empty grinder and grind that all the way through. It will help clear out extra oil.
Jammed Beans
Every now and again, a bean or two doesn’t leave the roasting chamber during bit batch roasting. That means it roasts continuously until it gets as hard as a little pebble.
The problem with that is that they end up in bags of coffee beans from time to time, and your grinder can’t crush them.
It’s like they’ve been cooked so much, over and over again, that it’s just become a burnt bean.
Open everything up (using our instructions below) and see if a single bean is lodged in between your burrs.
Misaligned Burrs
Burrs can become misaligned, but this isn’t just something that you can fix by yourself.
Most of the time, it requires a maintenance professional to actually go into your unit and mess with the grinder itself instead of just common parts like the motor or wired connection.
This is uncommon, and not something you should attempt on your own.
How to Unjam a Coffee Grinder, Step by Step
Diagnosis and Unplugging

First of all, you have to diagnose the issue. Turn the grinder on with a cup or some sort of catch tray underneath, and see if it even outputs anything.
If it’s just making a whirring sound, like it’s trying to work but nothing is coming out, then you need to unplug it.
Regardless of how powerful your grinder is, treat it like it’s twice as harmful.
Be 100% certain that your hands are nowhere near the grinder mill, and try the button operation even though it’s unplugged.
Cables can still hold onto residual electricity after they’ve been unplugged, and we want to be safe.
Check Hopper
Inspect the hopper. Normally, it will be an ABS plastic dome, so it’s sturdy enough for the job, but when it breaks it breaks.
Inspect it for cracks along the edges, which will usually run vertically down to the base of the hopper.
This can impair the hopper from actually depositing the necessary amount of beans into the burr grinder. Once you’re done inspecting it, move on.
Remove Hopper
Some are held in by screws, some are only clipped in. Either way, you need to remove the hopper so you can get to the root of the problem.
There might be grinds, there might be beans here. After you remove the hopper, set it aside for cleaning.
Cleaning it out will remove oils that could hold onto debris, which could cause future jams or grime buildup.
Use a Vacuum
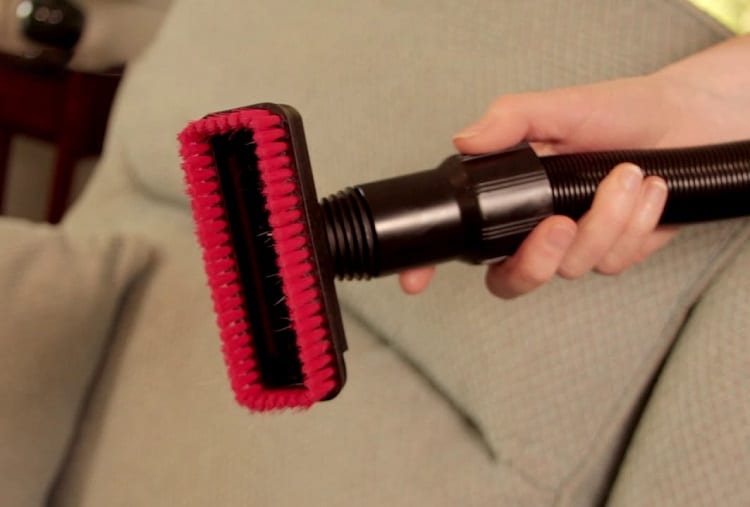
Now that the hopper is gone, you’re going to see the spot that it rests.
There’s going to be bits of coffee bean shells and powder here, it’s going to look like a caffeinated excavation site.
If you have a narrower attachment for your vacuum hose, now would be a good time to attach it. This will help you get the larger debris out.
From here, use your brush-style vacuum hose attachment to disturb the sediment that’s formed inside this area.
Reset Coarseness Settings
Something might be jammed in an area that you can’t see. Turn the coarseness setting all the way up, and then all the way down.
This is usually a dial that requires a good amount of force to move.
Positioning this back and forth will allow you to wedge the beans inside of the grinder and knock them loose, effectively unblocking debris and beans that could be in the way.
You’re not just going to go from this to replacing the hopper and testing the grinder again—there’s still more that needs to be done.
Empty Beans
Some beans that were lodged in the machine might have been trapped inside. Empty them out and see if anything comes to the surface once you use the coarseness settings.
Grind on Empty
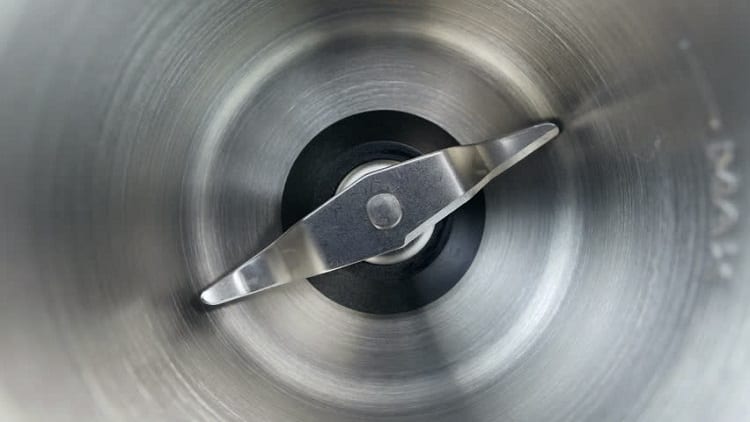
Plug it back in without the hopper installed. Grind while the machine is empty to see if it removes the jam.
You should see powdery debris come out. This is the result of the remaining powdered coffee grounds in the machine that were loosened when you toyed with the coarseness settings.
Eventually, you will hear the sound of it whirring to life with no results just like we did during the diagnosis. Once the grinder stops producing anything, move on to the next step.
Run a Grindz Tablet or White Rice
Grindz tablets are commercial tabs that clean your grinder without introducing any bad chemicals into the mix.
They’re organic, so even if you end up with trace elements in your next batch of coffee, you’re going to be A-okay.
If you don’t want to use that or it’s not available to you, you can simply use a full cup of white rice. Grind it up, and it will remove oil and most of the debris from the edges of the burr.
Reassemble and Grind
After attaching the hopper and resecuring it, add half a cup of coffee beans into your hopper. That’s not a lot, but it’s enough to move through the grinder and test if it’s working.
If it is, you might see small white flecks from either of the two methods mentioned in line number eight.
That’s okay because you’re going to throw your first few batches of grounds out anyway. Go through two full cycles and test the grounds for size. Adjust as needed.
Do Burr Grinders Wear Out?
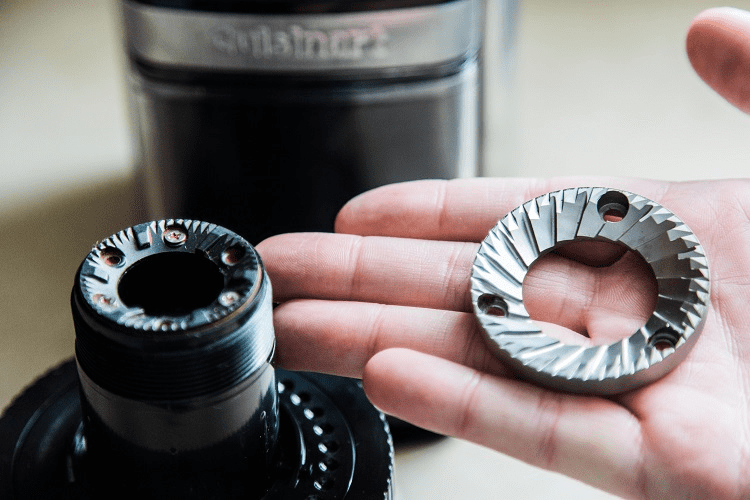
Most modern-day burr grinders are built extremely tough, and shouldn’t give you on you for any reason.
Coffee beans are hard, especially stronger blends like a dark roast (because they’re roasted to a higher temperature), but your burr grinder will be able to handle it for a very long time.
The two main issues with “wearing out” your burr grinder are dulling and motor troubles.
Your stainless steel bur will always do its best job to crush beans, but there are some edges inside the unit (the notches in each of the two burr cones) that can dull over time.
Now, you can still make a decent brew of coffee with it, because the grounds won’t come out unless they reach the criteria of the size that you’ve set.
It just might take longer, and you might have to clear it out more often.
Burrs can be replaced by you or by a professional, but the latter may end up costing you more than you spent on the grinder in the first place.
As for motor problems, this is more common in commercial units that are literally brewing 3.30 ounces of coffee every five minutes for eight hours at a time.
No motor is made to last forever, so it’s important to determine if this is the problem early on. If you can turn your grinder on, it means the electrical circuitry is good.
If the burr is completely clear of beans and debris, but it’s still giving that no-life whirring sound when you flick it on, then you’re most likely looking at a dead motor.
These are no cakewalk to replace.
Enjoy Your Clean and Clear Grinder
Once your grinder is clean and clear of debris, you can grind and let those burrs crush beans together like it’s nobody’s business.
You’re in the seat of power when it comes to how you enjoy your coffee, so make sure that every single coffee bean counts.
Make sure that every single coffee bean gets ground up and enjoyed.
